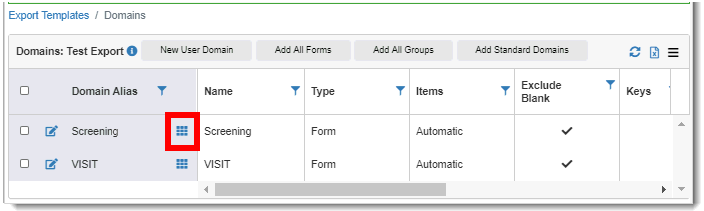
Edit Domain Mapping icon.
You can edit export domain mapping by editing variables in the Domain Columns table. Typically, objects that are mapped include: Trial Name, Trial Number, Trial Caption, Site Name, Site Number, Site Caption, Patient Initials, Patient Number, and data entered on forms within the study. Other options include:
· Add a domain variable by dragging an item from the Object Hierarchy tree into the Domain Columns table
· Filter export data according to logic conditions
· Add unions to combine data from multiple sources (forms or groups) in one domain
· Rebuild the queries of domain variables
To edit domain mapping:
1. Access the Export Template Domains page. (See Properties of Export Templates for guidance.)
2. Click the
Edit Domain Mapping icon.
The Domain Columns page displays.
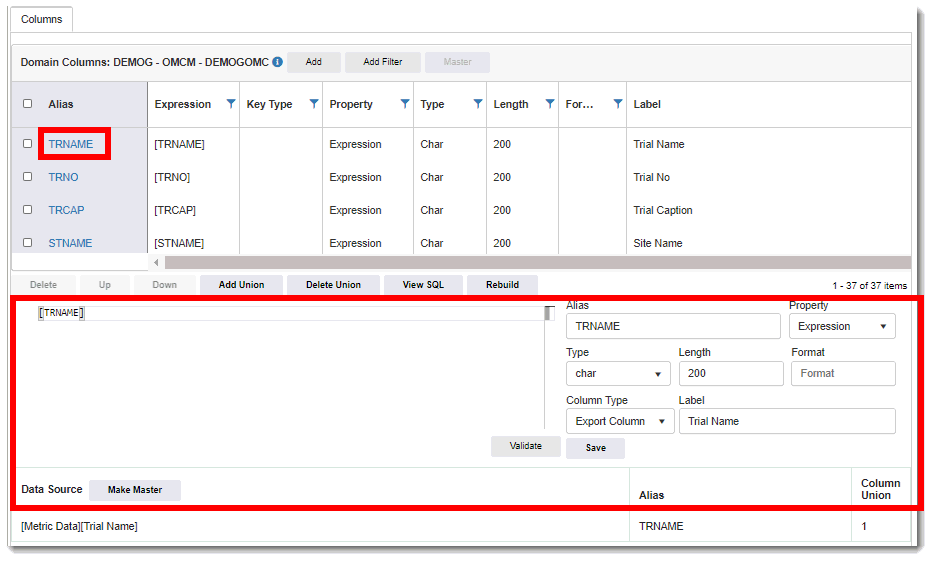
3. To edit an existing variable, click on the applicable name under the Alias column and make your edits in the middle panel:
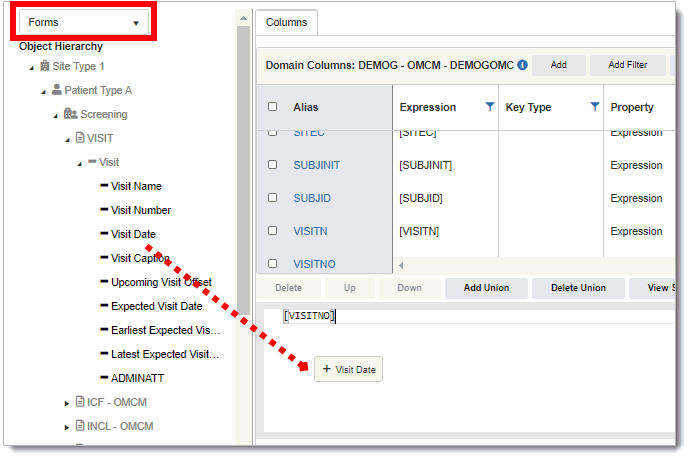
· From the Object Hierarchy Tree, select the desired data source from the drop-down list: Forms, System Forms, Metric Data, or Export Template (to base a domain on another template).
· Using the  Expand
icons, drill down to the applicable item (indicated by the
Expand
icons, drill down to the applicable item (indicated by the icon). Drag and drop the
object to the left
panel below the Domain Columns table.
icon). Drag and drop the
object to the left
panel below the Domain Columns table.
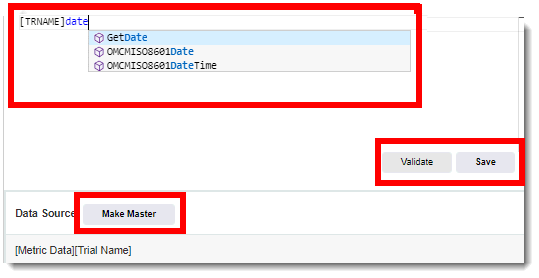
· Edit the code as necessary in the left and middle panels. To automate the code, you can enter the first few characters of a function and select it from the drop-down list. In the example below, the user typed "date" which displays date functions such as "GetDate".
· Click the Validate button to ensure the code is valid. If an error occurs, the error description displays in red text below.
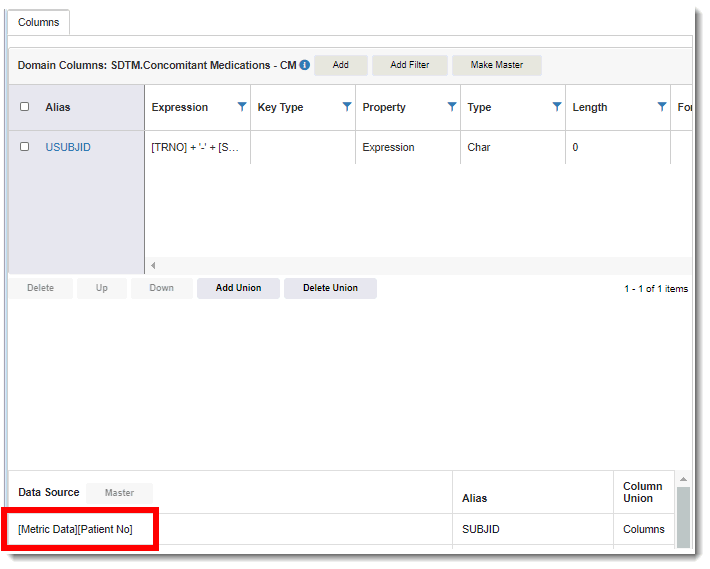
· Click the Make Master button to view only the data sources that make up the variable. When clicking a data source name in the Data Source table, only the domain variable associated with the data source displays in the Domain Columns table above. For example, clicking on [Metric Data][Patient No] displays the data source(s) in the Data Columns table below. (This button is only enabled if you click the Master button in the Domain Columns table header, and you can toggle between the Master/Make Master buttons to filter by domain variables/data sources.)
· Click the Save button to save the changes.
4. If applicable, click the any following buttons in the Domain Columns table header:
· Add – to add a new column to the domain. Click the OK button in the confirmation message. The new domain variable named "USER001"displays in the table and two new panels display below the table. Refer to the steps above as guidance when entering/editing the code. (You can edit the domain alias name in the Alias field of the right panel below the table.)
· Add Filter – to filter the domain, select (check) click the Add Filter button at the top of the page. (The Add Filter button changes to the Edit Filter button so you can edit the variable at another time.) (See Modify Domain Filter for guidance on entering the filter data.)
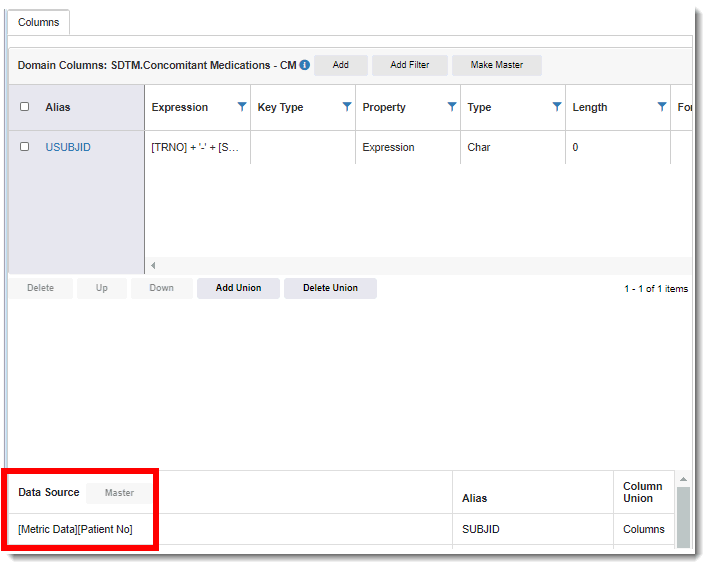
· Master (default) – To view all variables in the Domain Columns table. When clicking on a name under the Alias name column in the Domain Columns table, only the data source associated with the domain variable displays in the Data Source table below. For example, clicking on USUBJID displays the domain variable in the Data Source table below. (This button is only enabled if you click the Make Master button in the Data Sources table header, and you can toggle between the Master/Make Master buttons to filter by domain variables/data sources.)
5. If applicable, select the check box of the applicable domain variable(s) and then click any of the following buttons below the table:
· Delete – to delete one or more domain variables
· Up/Down – to move a domain variable up/down the list in the table. (This button can only be selected for one domain variable at a time; it is disabled/grayed if you select more than one variable.)
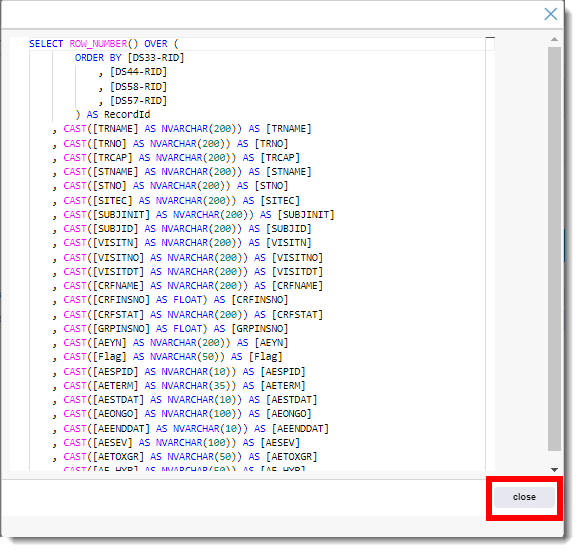
· Rebuild – to generate queries of a domain variable. To view SQL code, you must click this button first. (You cannot rebuild the domain in an unsaved template.)
· View SQL – to view the SQL code of a domain variable. This button is not viewable unless you click the Rebuild button first. A separate scrollable window displays the SQL code as Read-Only. (Click the Close button to exit the window.)
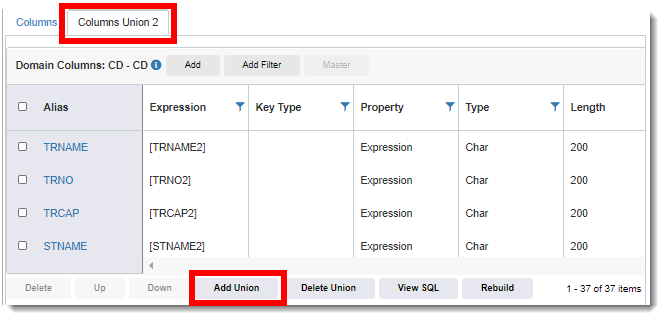
6. To combine data from multiple sources (forms or groups) in one export template domain, click the Add Union button. For example, you can show results from two or more different lab forms in the domain. A new tab containing the all column data displays at the top of the table. (As you add more unions, each tab increments by 1. For example, in you add another union, the Column Union 3 tab displays.) (Click the Delete Union button to delete a union.)
 Notes:
· You must be in Restricted Editing mode to use the View SQL and Rebuild buttons.
· The only domain variables that can be dragged to the left panel are shown in black in the Object Hierarchy tree.
· See View Properties of Export Templates for more information about the Object Hierarchy tree.