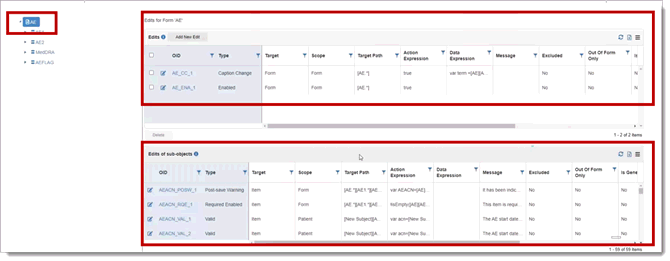
button below takes you to all of
the edit checks that are present on that form.
button below takes you to all of
the edit checks that are present on that form.Refer to the following guidelines when creating edit checks.
Edit Check Basics
The Action Expression must return a Boolean (True or False) value as its last statement.
Edit checks do NOT use the Return JavaScript keyword.
The final statement in a check is the value that is returned (this can be a variable or a comparison, etc.) e.g.:
[Item] == ‘EXPECTED VALUE’
res;
!_isEmpty(val)
Development Timing and Scope
Anju recommends completing the study object build before beginning edit check programming (forms created and assigned to visits, visits assigned to subject, etc.). However, you can begin creating edit checks as soon as the objects they reference are created at the correct levels.
If an edit check does not refer to anything outside of the form, and is not dependent on something like which visit the form is in, then you can program that check as soon as the form is complete (e.g., a calculated field can be set to always Read Only, or an “Other, Specify” field can be set to depend on another field on the same form).
Inheritance for TB Objects
Remember that objects in TrialBuilder have upward inheritance. This means that if you write an edit check at a lower level, that check runs everywhere that the object exists unless otherwise specified. If you set an item to Required at the form level, for instance, then that item is required on every instance of that form.
Once you have study structure in place for creating
edit checks, you can follow several paths to navigate to edit checks on
an object. When viewing the list of forms, the button below takes you to all of
the edit checks that are present on that form.
Navigating Edit Checks
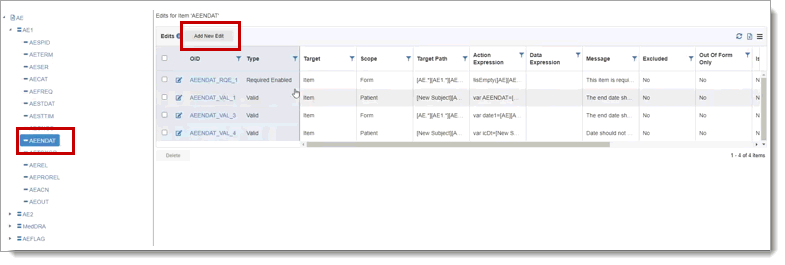
To expand the form, use the arrow at the left to view all the groups and items on the form. Clicking on the form displays the edit checks for that form and its sub-objects.
If you expand the form node on the left, you can click on individual groups or items within the form. Clicking on a group or an item displays the edit checks for that object. Clicking the Add New Edit button to add a new check for the currently selected object. You can view checks at higher levels (the Scope column displays the level).
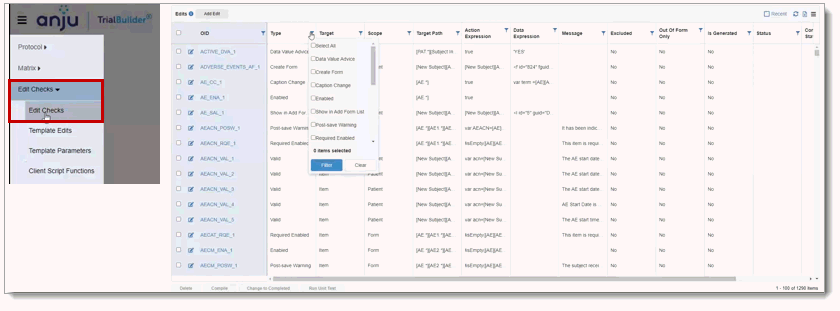
To
view all the edit checks in the study, use the  Main
Menu to navigate to edit checks. You can filter on
the columns to narrow down the result.
Main
Menu to navigate to edit checks. You can filter on
the columns to narrow down the result.
Edit Check Window
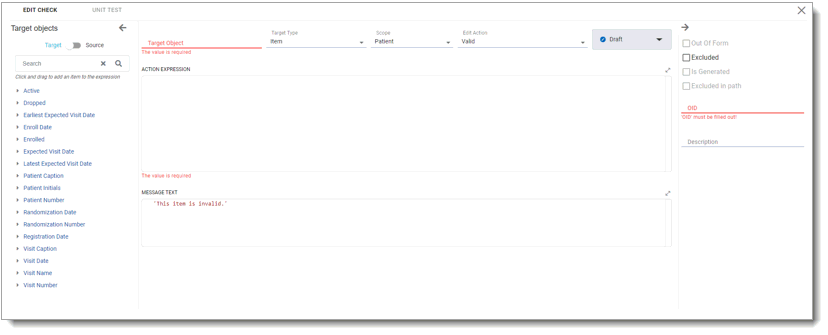
Clicking the Add New Edit button after selecting an object displays the Edit Check page.
Navigating TB to Write Edit Checks
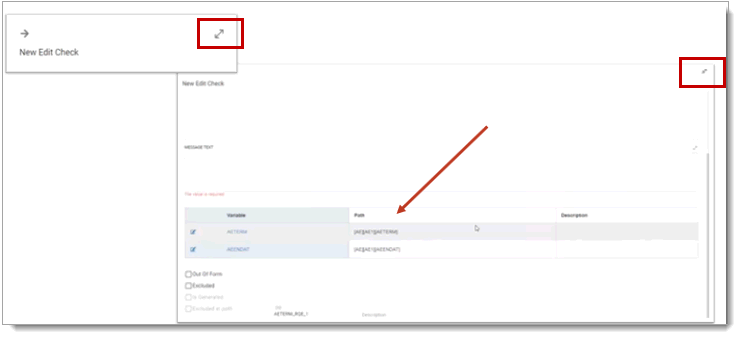
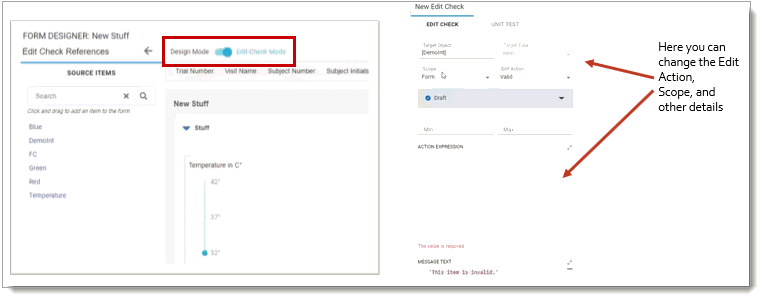
In the Form Designer, you can toggle between Design Mode and Edit Check Mode. Clicking on an item displays the edit checks for that item and allows you to add a new edit check on the right-hand side. You can also expand or collapse the edit check window to see full details and paths of the edit check.
Edit Check Window
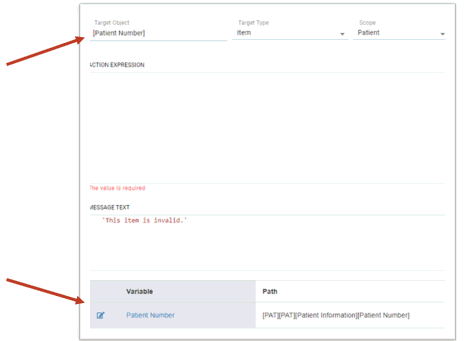
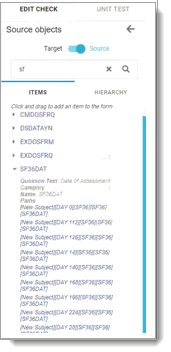
If you are not working from Form Designer page, you can expand an item in the left pane and drag and drop the value into the Target Object field at the top if it was not previously filled in.
The target object is the object that is affected by the edit check (properties checks) or where a validation displays in TrialMaster. You can then view this item in the Target Object field and under the Variable/Path column.
Depending on the selected edit action, different sections display below. Some edit check types require a message (Required, Required/Enabled, Valid). Some edit check types have both an action expression and a data expression. All check types must return True or False in the Action Expression section.
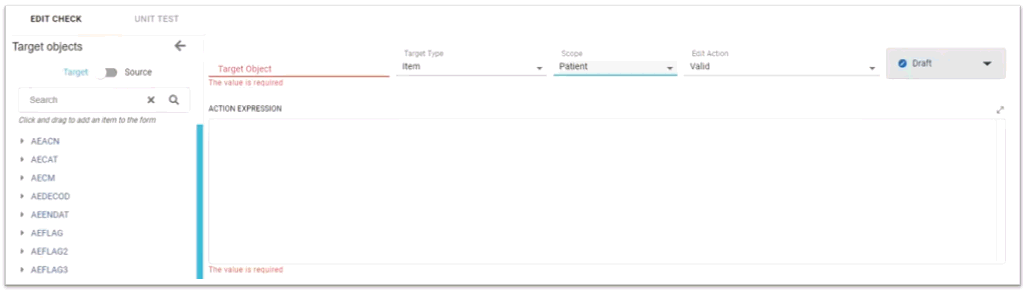
When expanding the left pane, you can view all the various paths associated with an item, and drag-and-drop a specific path if desired.
The scope means how much of the study build you need access to write your edit check. If an edit check only needs to use items on the current form, the scope is Form. If the check needs to compare values across forms in the same visit, the scope is Visit. If the check needs to compare values in different visits, the scope is Patient.
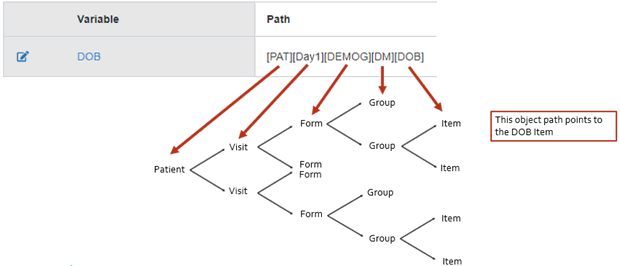
The study structure can be compared to a branching tree. You must write the edit check at a level that lets you “view” down the branches to all of the items that you need to reference in the edit check.
When dragging an object into a programming window, you can view the path to that object. The path can contain one or more of the objects, in order from left to right.
When dragging an object into a programming window, you can view the path to that object. The length of the path depends on the scope and object selected.
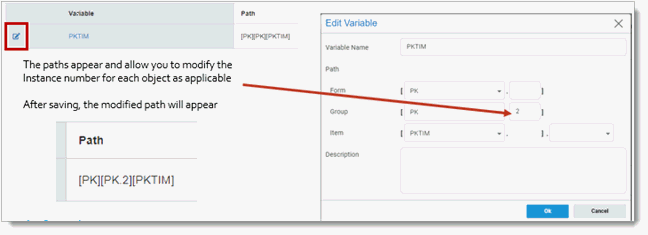
Paths are relevant both for the object that is acted on by the edit check, and for the objects that are evaluated in the script itself. Paths can also point to specific Instance Numbers of an object. Clicking the Edit icon next to the variable allows you to modify its path. This example shows the 2nd instance of the PK roup on the PK form.
Writing Edit Checks
All action expressions must return a Boolean value (True/False). All data expressions must return a value appropriate to the item type of the target item. The language for programming edit checks is JavaScript. (See JavaScript Examples, JavaScript Operators, and JavaScript Functions for more information.)
The _IsEmpty() client script function should be used to check whether a value is present. A check can be set to always evaluate to True or False, if appropriate, or to return a result dynamically based on other values entered by the user. Local variables should be used to define an item that will be referenced in an edit check (for readability and efficiency), for example:
var MyItem = [New Patient][Screening][VS][VS1][VSTIM];
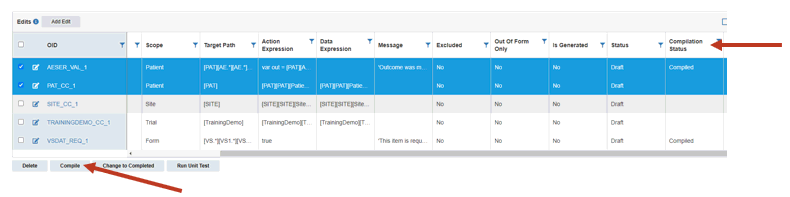
All edit checks should be compiled to ensure that the code fires (executes) without errors. This compilation process does not check the logic, only the syntax. You can use the Compile button at the bottom of the Edits page. Or, you can select checks to compile in the Edits window (you can filter the Compilation Status).